Security Document
The most commonly performed security document tasks in daily life — creating, releasing, destroying, changing access targets, folder/compression unit tasks, and responding to errors during tasks are all guided.
1. Creating Security Documents (Personal)
Creates a security document for personal use.
- Right-click on a regular file in the explorer.
- General Document EncryptionSelect.
- Personal Security DocumentSelect.
- Security Document CreationPress the button.
During the process, you can check the processing status with a progress indicator. Check the results on the completion screen.
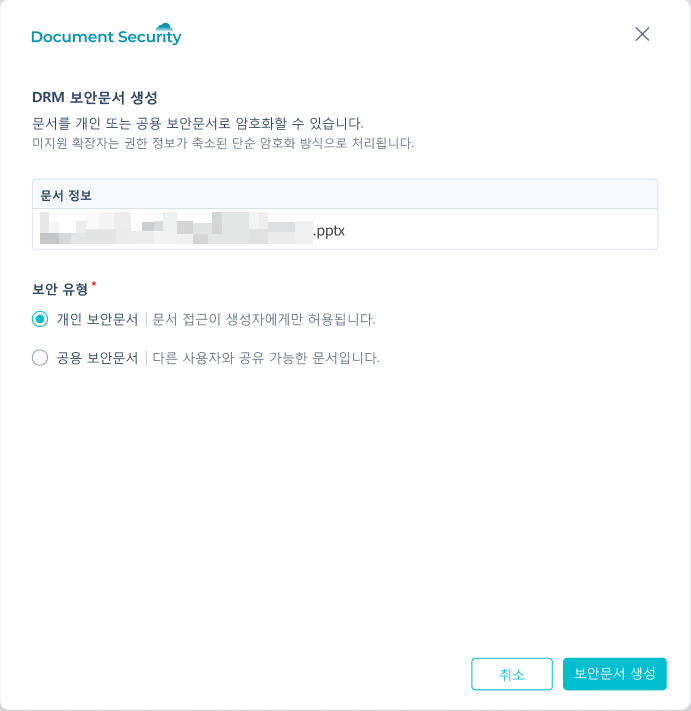
2. Creating Security Documents (Public)
Create a secure document that other users can access.
- Right-click on a regular file in Explorer →General Document EncryptionSelect.
- Public Security DocumentSelect.
- The shared permission settings area appears on the screen.
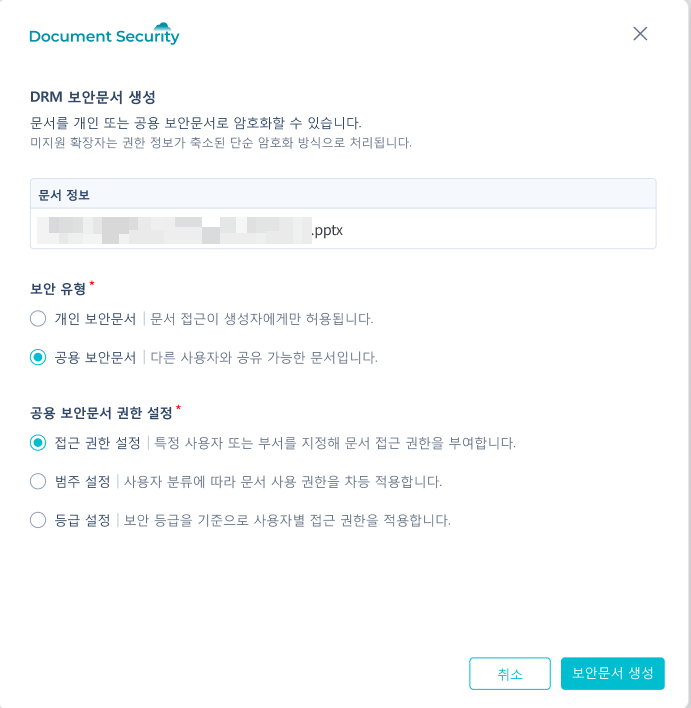
- By default, access permission settings are selected, and additional settings are made by choosing options that meet the requirements.
- The shared permission settings area appears on the screen.
- Security Document CreationPress the button.
| Security Document Generation Single File | Security Document Generation Multiple Files | When selecting a public security document |
|---|---|---|
 |  |  |
3. Creating Security Documents by Category and Level
If company policy requires categorization or classification in documents, an additional category and classification section is set up when creating public security documents.
| Category Settings | Grade Settings |
|---|---|
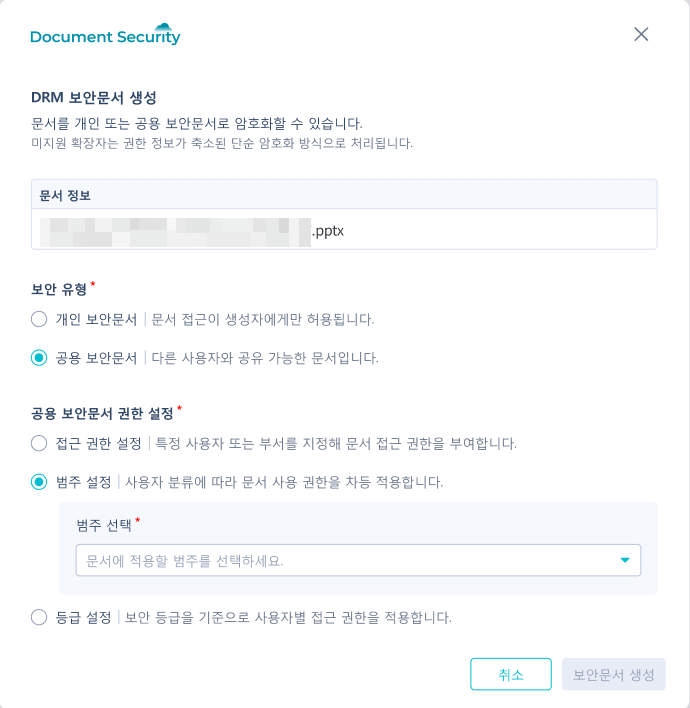 |  |
- On the shared security document screenCategory SettingsorGrade SettingsSelect.
- When setting categories:
- The subpanel appears and select a category from the dropdown. Until you complete the selection.Security Document CreationThe button remains in a disabled state.
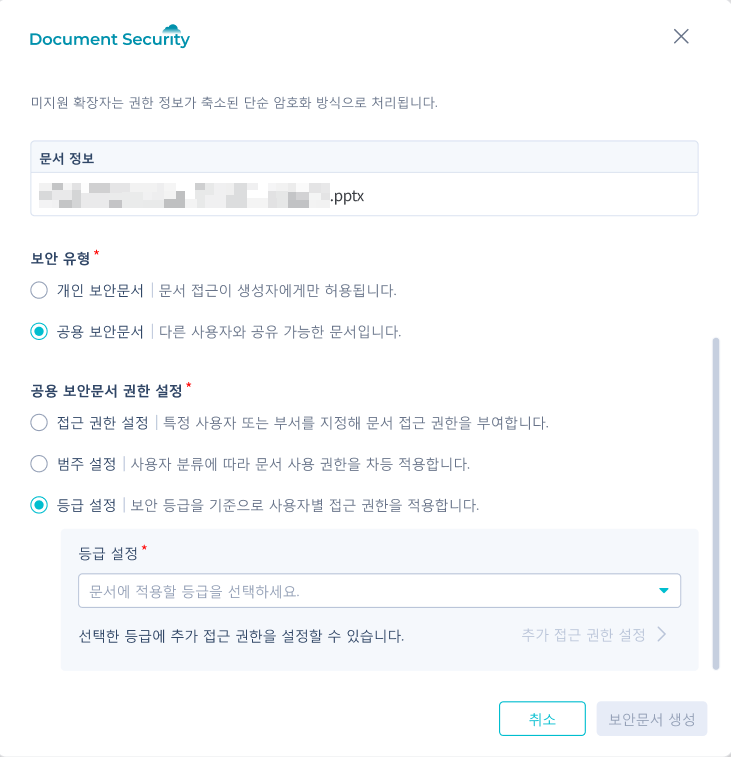
- When setting the grade:
- When you select a gradeAdditional Access Permission SettingsThe area will be activated. Specify additional access permissions if necessary.
- When you finish your selectionSecurity Document CreationThe button will be activated. Press the button to proceed.
4. Release Security Document
Decrypting the security document into a regular file.
- Right-click on the security document selected in the explorer.
- Decryption of Security DocumentSelect.
- When the confirmation dialog appears, check the content and proceed.
- When the progress indicator is complete, the results screen will be displayed.
DSD type security documents can also be released using the same menu, and the results can be checked on the release completion screen.
5. Disposing of Security Documents
Delete the security document in an unrecoverable state.
Caution— The deletion operation cannot be recovered from the recycle bin. An additional confirmation message will be displayed to prevent accidental presses.
| Destruction of Security Documents | Destruction Notification | No confirmation dialog displayed (option) |
|---|---|---|
 | 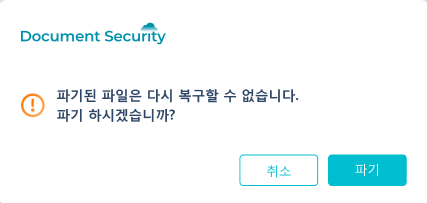 |  |
- Right-click on the security document selected in the explorer.
- Security Document DestructionSelect.
- Additional Confirmation MessageIt will be displayed. Please confirm again if this is the document you really want to delete.
- When proceeding, the destruction progress will be displayed, and it will end with the completion screen.
6. Change Access Target (Organization Chart)
Select and change the access target of the existing security document from the organizational chart tree.
| Organization Chart Tree | Search Button |
|---|---|
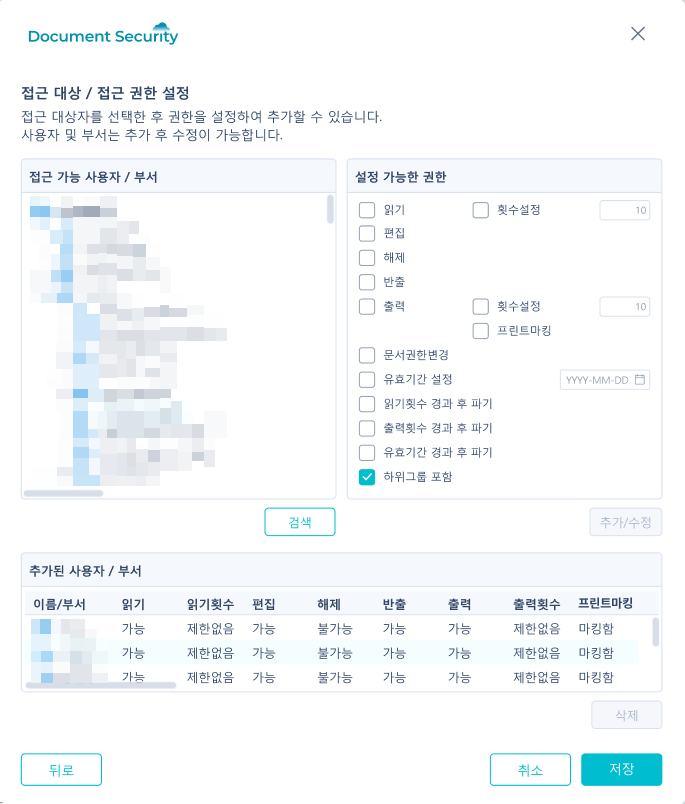 |  |
- Right-click on the security document selected in the explorer.
- Change Target AccessSelect.
- Expand the organization tree to add companies, departments, groups, and individuals.
- Click the apply button.
7. Change Target Access (Search)
In environments where the organization is large or where company policy has enabled search mode, use search instead of the organizational tree to add access targets.
| Search Options Based |
|---|
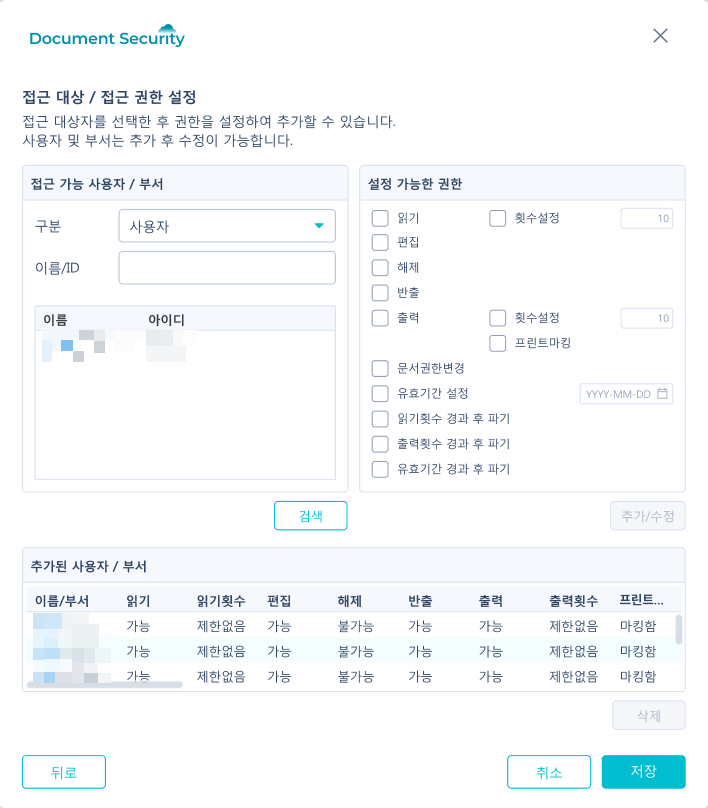 |
- Right-click on the security document in Explorer →Change Target AccessSelect.
- You can search by entering the names of people or groups in the search mode screen.
- Select the target from the search results and add it.
- Click the apply button.
The activation status of the search mode varies by operating environment.
8. Assigning Access Permissions and Designating Grades After Rating
After selecting the grade security document creation option → proceed with additional settings on what permissions to grant to the access target (reading, editing, output, etc.).
| Display the specified grade information after grade assignment |
|---|
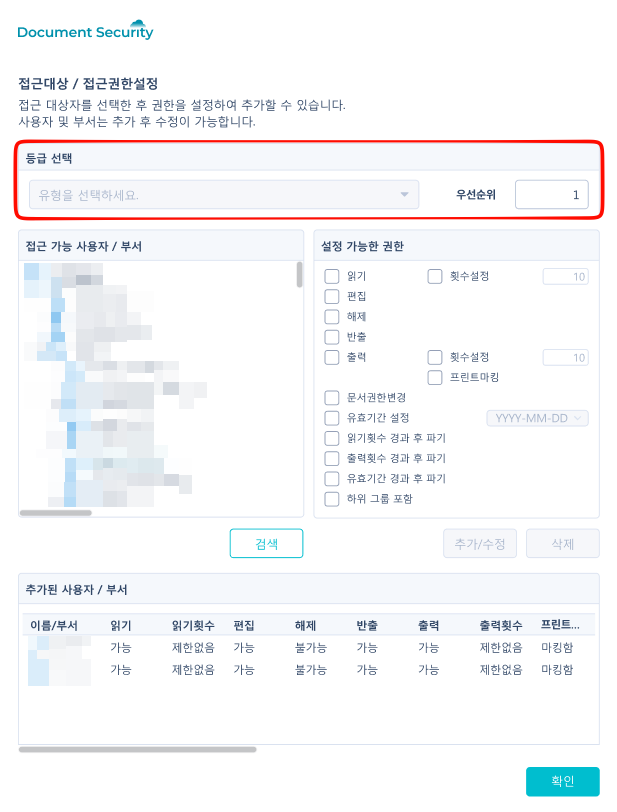 |
- Change Target Access or Security Document Creation ScreenGrade SettingsOpens the area.
- Select the appropriate grade from the list of grades established according to company policy.
- After selecting the gradeAdditional Access Permission SettingsThe area will be activated. If necessary, permissions can be specified in detail for each user.
- Applying changes.
9. Folder Unit Work
When you need to process multiple files at once, use the folder-level menu.
Right-clicking on the folder will display the following menu.
| Menu | result |
|---|---|
| File Encryption in Folder | Convert regular files in the folder to secure documents all at once. |
| Simple Encryption of Files in a Folder | Only simple encryption is applied without authorization. |
| Decryption of files in the folder | Revert the security documents in the folder to regular files. |
| File Access Targets/Permission Settings in Folder | Change the access targets of the security documents in the folder all at once. |
Folder unit tasks also display progress just like single file tasks, and after completion, you can check the processing results through the results screen.